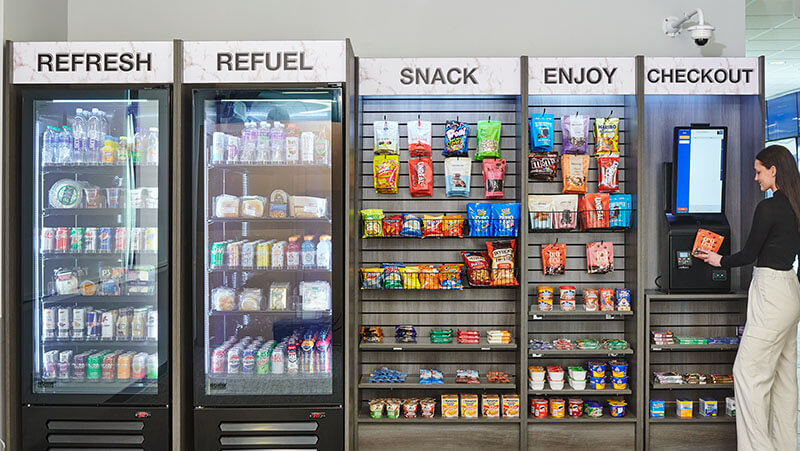
A Step-by-Step Guide to Installing a Nayax Card Reader on Your New Vending Machine

Considering professional installation? Don’t sweat it! Our experienced technicians can handle the job for you. Call Jacksonville Vending Machines today at 904-456-3851 and ask about our affordable $149 installation fee! Now, if you’re feeling handy and want to tackle it yourself, keep reading!

Installing your new card reader:

At Jacksonville Vending Machines, we understand the importance of offering convenient payment options for your customers. That’s why we’re here to guide you through the installation process of a Nayax card reader on your brand new vending machine. This easy-to-follow guide will have you accepting cashless transactions in no time!

What You’ll Need:

  • Your new vending machine (with Nayax card reader compatibility)
  • Nayax card reader kit (including reader, mounting bracket, cables, and screws)
  • Drill and appropriate drill bits (as specified in the Nayax card reader manual)
  • Phillips head screwdriver
  • Zip ties (optional, for cable management)

Step-by-Step Guide:

  • Choose a Spot: Choose a suitable spot for the Nayax card reader on your vending machine. Important: Ensure the chosen location allows for easy customer access and doesn’t interfere with the vending machine’s operation.
  • Mark the Drilling Points: Nayax card reader kits typically come with a template to mark the drilling points. Carefully place the template on your chosen location and mark the drilling holes with a pen.
  • Drill the Holes: Equip yourself with the appropriate drill bits as specified in the Nayax card reader manual. Drill the holes carefully, ensuring they align perfectly with the markings.
  • Mount the Reader: Line up the Nayax card reader’s mounting bracket with the drilled holes. Secure the bracket to the vending machine using the provided screws.
  • Connect the Cables: Carefully connect the Nayax card reader cables according to the manufacturer’s instructions. These typically include a Multi-Drop Bus (MDB) cable and an antenna cable.
  • Power Up and Test: Turn on your vending machine and check for any error messages related to the card reader. Consult the Nayax card reader manual for troubleshooting if needed. With the power on, try simulating a cashless transaction using a test card (provided by Nayax). This ensures the card reader is functioning properly.
  • Cable Management (Optional): Use zip ties (not included) to neatly organize the excess cables for a clean and professional look.

Congratulations! You’ve successfully installed your Nayax card reader and are now equipped to accept cashless transactions on your vending machine.

Need a Helping Hand?

Remember, Jacksonville Vending Machines offers professional installation services for Nayax card readers at an affordable price. Don’t hesitate to call us at 904-456-3851 and let our experts handle the installation for you! Contact Form